


Organize your photos !

Make a great movie in the time you have !

Your Recording Studio !

Design a website to share your photos, movies, and music !

Create your own DVD in less time than it takes to watch one !

iLife ’09 System Requirements:
- Mac computer with an Intel, PowerPC G5, or PowerPC G4 (867MHz or faster) processor
- iMovie requires an Intel-based Mac, Power Mac G5 (dual 2.0GHz or faster), or iMac G5 (1.9GHz or faster).
- GarageBand Learn to Play requires an Intel-based Mac with a dual-core processor or better.
- 512MB of RAM; 1GB recommended. High-definition video requires at least 1GB of RAM.
- Approximately 4GB of available disk space
- DVD drive required for installation
- Mac OS X v10.5.6 or later
- QuickTime 7.5.5 or later (included)
- AVCHD video requires a Mac with an Intel Core Duo processor or better. Visit iMovie ’09 Camcorder Support for details on digital video device and format support.
- 24-bit recording in GarageBand requires a Mac OS X-compatible audio interface with support for 24-bit audio. Please consult the owner’s manual or manufacturer directly for audio device specifications and compatibility.
- Some features require Internet access and/or MobileMe; additional fees and terms apply. MobileMe is available to persons age 13 and older. Annual subscription fee and Internet access required. Terms of service apply.
- iPhoto print products are available in the U.S., Canada, Japan, and select countries in Europe and Asia Pacific.
- GarageBand Artist Lessons are sold separately and are available directly through the GarageBand Lesson Store in select countries.
- Burning DVDs requires an Apple SuperDrive or compatible third-party DVD burner.
- Flickr service is available only in select countries.
iLife Tips and Tricks:
PDF Manuals:
iPhoto:
iMovie:
GarageBand:
iWeb:
iDVD:
Sharing photos from Aperture with iLife:
Aperture 1.5 offers full-size previews of images that can be used with iLife and iWork '06 or later.
Make sure you have iLife and iWork:
- iPhoto
- iMovie HD
- iDVD
- iWeb
- GarageBand
- Keynote
- Pages
- iTunes
You will also need to update to Aperture 1.5. If you have a previous version of Aperture installed, Software Update can also be used to update to version 1.5.
How to access images from Aperture in iLife and iWork ?
To browse Aperture images in iLife and iWork, you must first enable sharing in Aperture.
Details can be found on pages 161-162 of the Aperture User Manual.
To view the shared images in iLife or iWork:
- Select the Media pane in one of the iLife/iWork applications.
- Click the disclosure triangle next to the Aperture icon in the browser window.
- Click the disclosure triangle next to Aperture Library to access images in Aperture's built-in Smart Albums or Smart Albums you have created at the Library level. To access images from specific projects, click the project's disclosure triangle. Click on the icon for individual albums or Smart albums within projects.
Handling of Stacked Images:
When you browse Aperture images in the iLife/iWork Media pane, you may notice that there seem to be fewer images than expected available there.
This is because only the pick or album pick image from each stack in Aperture is shared with iLife and iWork.
When you browse images from an Aperture project or built-in Smart album, the pick image from each stack will be available.
When you browse images from an Aperture album, then the album pick will be available.
If there is no album pick specified, then the pick image will be used when browsing albums. Smart albums you create offer the option Ignore stack groupings.
If this option is selected, then all images that meet the criteria for the Smart album will be available in the Media pane, regardless of stack pick status.
If you find that you need access to more than one image from a stack in an iLife or iWork application, then drag the non-pick image from the stack in Aperture, or access it from a self-created Smart album.
Note that it may take some time before changes made to stacks in Aperture will be reflected in the Media pane.
Labeling of Aperture images in the iLife/iWork Media pane:
If the Caption field for an image in Aperture is filled in, then this is what the iLife/iWork Media pane will display.
If the Caption field is empty, then the Version Name field will be used as the image label in the Media pane.
Sharing Aperture Images with iTunes/iPod:
Syncing Aperture images to an iPod is very much like syncing iPhoto images.
- Connect the iPod to the computer
- When iTunes 8 or later opens, choose the iPod icon in the Source list.
- Click the Photos tab in the Viewer.
- Choose Aperture from the Sync Photos from pop-up menu, and make sure the associated checkbox is selected.
- Select either the All Photos and albums or Selected albums radio button.
- If you opt for Selected albums, click the checkboxes for the albums you wish to sync with the iPod. Note that only albums (including Smart albums) are available, projects are not. Stacked images are handled in the same way as with the Media pane in the other applications.
Desktop Picture and Screen Saver:
Images from Aperture may also be used as the Desktop picture, or Screen Saver.
In both cases, the Aperture library is available in Source list.
- Choose the album or project you wish to use.
Sort order of Aperture images with the iLife Media Browser:
Here are some tips about how images will be sorted when you use Aperture 1.5.4 or later with the iLife Media Browser.
In most cases, the iLife Media Browser will display Aperture images in alpha-numeric order by version name.
Numerals will precede letters, and numeric sort is always by the first digit.
For example, the following four image names will be sorted in this order:
- 11-Image
- 2-Image
- A-Image
- B-Image
Doing this with the list above results in the list being sorted in this order:
- 02-Image
- 11-Image
- A-Image
- B-Image
Making presentations with Keynote:
Keynote lets you create stunning, interactive slideshows quickly and easily using professionally designed themes, cinematic transitions, and animated text.
With its interactive and timing features, you can build storyboards, self-running presentations, portfolios, and more.
Keynote's built-in iLife media browser gives you instant access to your iLife creations so it's simple to add your own photos, movies, and songs to your presentations.
You can also import data and media from other applications.
- If your computer has an Apple Remote, you can use it to control your Keynote presentations from a distance.
To learn more about Keynote or to purchase iWork, see the Keynote website at www.apple.com/iwork/keynote.
Resources for educators:
Apple has a rich history of supporting students, schools, and universities.
From Apple products and solutions specifically designed for education to technical resources for integrating Mac OS X into the educational environment, Apple offers products and services to help students learn and explore their creativity, and tools to help teachers and administrators provide the best possible learning environment for their students.
Some of the products and resources Apple provides are:
- iLife, the suite of creativity applications that includes iPhoto, iMovie, iTunes, iDVD, and GarageBand
- PowerSchool, a web-based student information system from Apple that simplifies data-driven decision making by providing real-time information to all stakeholders over the Internet
- IT resources such as Apple Xsan and Information Lifecycle Management
Where are my applications?
Mac OS X includes many applications to help you get started quickly and easily using your Mac.
You'll find many frequently used applications in the Dock, and you can add applications to the Dock whenever you want.You can also open your most recently used applications and documents by choosing the Recent Items command in the Apple menu.
Use the iLife suite of integrated applications to make music, produce movies, create digital photo slideshows, burn DVDs, and more.
- The suite includes GarageBand, iPhoto, iMovie, iDVD, and iTunes.
Don't rename or move iLife applications:
If you have iLife installed on your computer, do not rename or move any of its applications from the default Applications folder.
- This includes iDVD, iMovie, iPhoto, iTunes, and GarageBand.
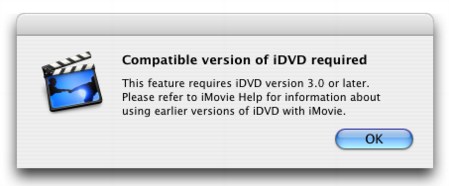
You get the following alert when you try to use iMovie's "Share with iDVD" feature or click the Create iDVD Project button:
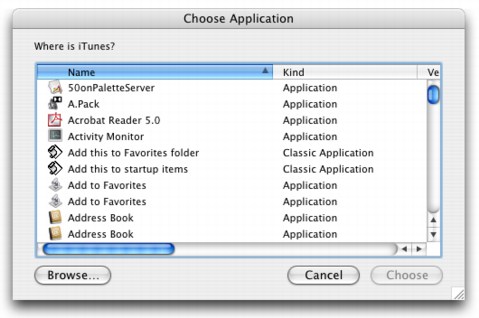
For the best results, don't change the name of the individual iLife applications in the Finder.
Also, leave the iLife applications in the Applications folder of the startup disk (don't move them outside of this folder or into a subfolder).
Moving or renaming the iLife applications can also cause issues when updating or upgrading to newer versions of the iLife applications.